Saturday, 12 August 2017

WHF-The Journey Part Two

The Journey To Mordheim Part Two

House Rules

Since I am playing this game solo, for randomness, attacks will be rolled on a d12, 1-8 will come from a designated spot, 9 – 12 will generate no attack. After each conflict point has passed. I will add +2 to the dice roll. Multiple attacks are possible. For each enemy taken out of action, gain 1d6 Gold Coins. For each battle won, gain 10 GC.

I am running this as a Scenario 2: Skirmish for the purposes of experience gained.

Roll for Weather

 8 = Raining. All missile + Powder weapons at -1 to hit, BP weapons only fire if 1d6 roll is 4+.

Dwarf Team 1 

Leader Bronn (Bow, Hammer, Shield, Helmet, Dagger, Light Armour). Move 3.
Champion Eldrand (Banner- Mace, Helmet, Dagger, Light Armour). Move 3.
Champion Yolm (D Axe, Shield, Helmet, Dagger, Light Armour). Move 3.
Thunderer Strom (Horn - Mace, Pistol, Helmet, Dagger, Light Armour). Move 3.
Beardlings Klacker, Grinder and Gormish (D Axe, Shield, Dagger). Move 4.
4 Gold Coins saved. Warband Rank = 71.

Our weary travellers are walking along a muddy dirt track, approaching an old, battered camp site, at a woodland crossroads. It has been a long, soggy, slippery, uncomfortable day for them. The woods have given them a welcome respite from the wind, if not from the dampness, for most of the afternoon. Smiles beam across their faces at the thought of removing their boots and resting their feet in front of a nice warm fire.

The woodland path.

 The camp site and bridge across the river.

 (Random Roll to camp here or continue onwards.)

The view from the bridge.

The company began to quicken their pace, but their leader, Bronn, speaks up, “Steady up boys, we are going to continue on to the trading shack that is in the next valley. But we will fill our flasks up, as usual, at the river.”

 The campsite from the wood.


 As they fill their canteens at the river bridge and have a quick break from the day's march .........

A raven's eye view of the company passing each other canteens to be filled.

Conflict point 1

(A Random Attack was generated = From Point 3 by Pack Two, Lizardmen.)

Leader Yellow Top, (Bow, Claw, Str 3, Move 5, Leader 7).
Champion Red Top 1 + 2, (Bow, Claw,  Str 3,Move 4, Leader 7).
Fang Red Top, White Top 1 + 2, (Bow, Claw, Str 2, Move 4, Leader 4).
Juveniles Blue Top 1-3  1 + 2, (Bow, Claw, Str 2, Move 4, Leader 7).
180 Gold Coins saved. Warband Rank = 81.
Turn 1

A lizard war party are going towards their nest when through the trees, they see the intruders.

Lizards starting point.
Their first sighting.


 “Invaders" hisses Yellow Top, "They must not discover our nest site, kill them all !”
Eldrand is first into battle.

The Juveniles, on the right, make the best use of the swampy cover.

The view along the stream path.
Yellow Top directs his warriors to attack from the left, while he and his champions move along the path, the warriors quietly start to take the left flank through the wood, the soggy leaves masking their steps, making the best use of the cover available. With a quick nod from their leader, the juveniles slip into their natural element, the river and begin to advance towards the enemy.
View from the woods.
 Once they have moved closer, the Skinks on the path fire arrows at the intruders.

Eldrand, the champion carrying the Banner of House Fourscar, shouted, “We are under attack !” and charged the nearest Skink, coming towards him along the path, which happened to be their leader Yellow Top. The fighting spills over into the camp ground.

Bromm and the others moved forward, except Strom, who readies his pistol for action.

Juvenile 3 fires at Strom hastily, but missed his victim completely (1). Juvenile 1 fired at Bromm, but shows its inexperience too and misses (1) by a foot.

Red Top 1 fires at Yolm, but misses (3) only because Yolm was still moving to the side.


 The others are still too deep in the woods to shoot out at the moment, but they still study their opponents as they move forward.

Strom fires his pistol at one of the creatures splashing towards him in the water (Juvenile 3), but it strikes the bridge instead of his intended target. He curses in frustration and begins the process of readying the pistol for action and keeping it dry in the slowing drizzle

Eldrand hits Yellow Top with the large banner (the equivalent of a two handed Mace) (4), but it bounces off its scales (1).
Enraged by the blow to his dignity, Yellow Top hits Eldrand once with a claw (4,3), but it bounces off his armour (2).

Turn 2

(No recoveries needed).
Juvenile 1 charges Bromm (getting in the way of the champion Red top 2 as he did so),  Juvenile 2 gets itself stuck in the swamp, Juvenile 3 charges Grinder. Red top 1 moves towards the intruders, as do those in the forest, whose progress has been slowed down by thick undergrowth. Red top 2 charges in against Eldrand.

Strom and Gormish charge in to help Grinder. Klacker and Yolm charge Red top 1.
(No shooting targets were available.)
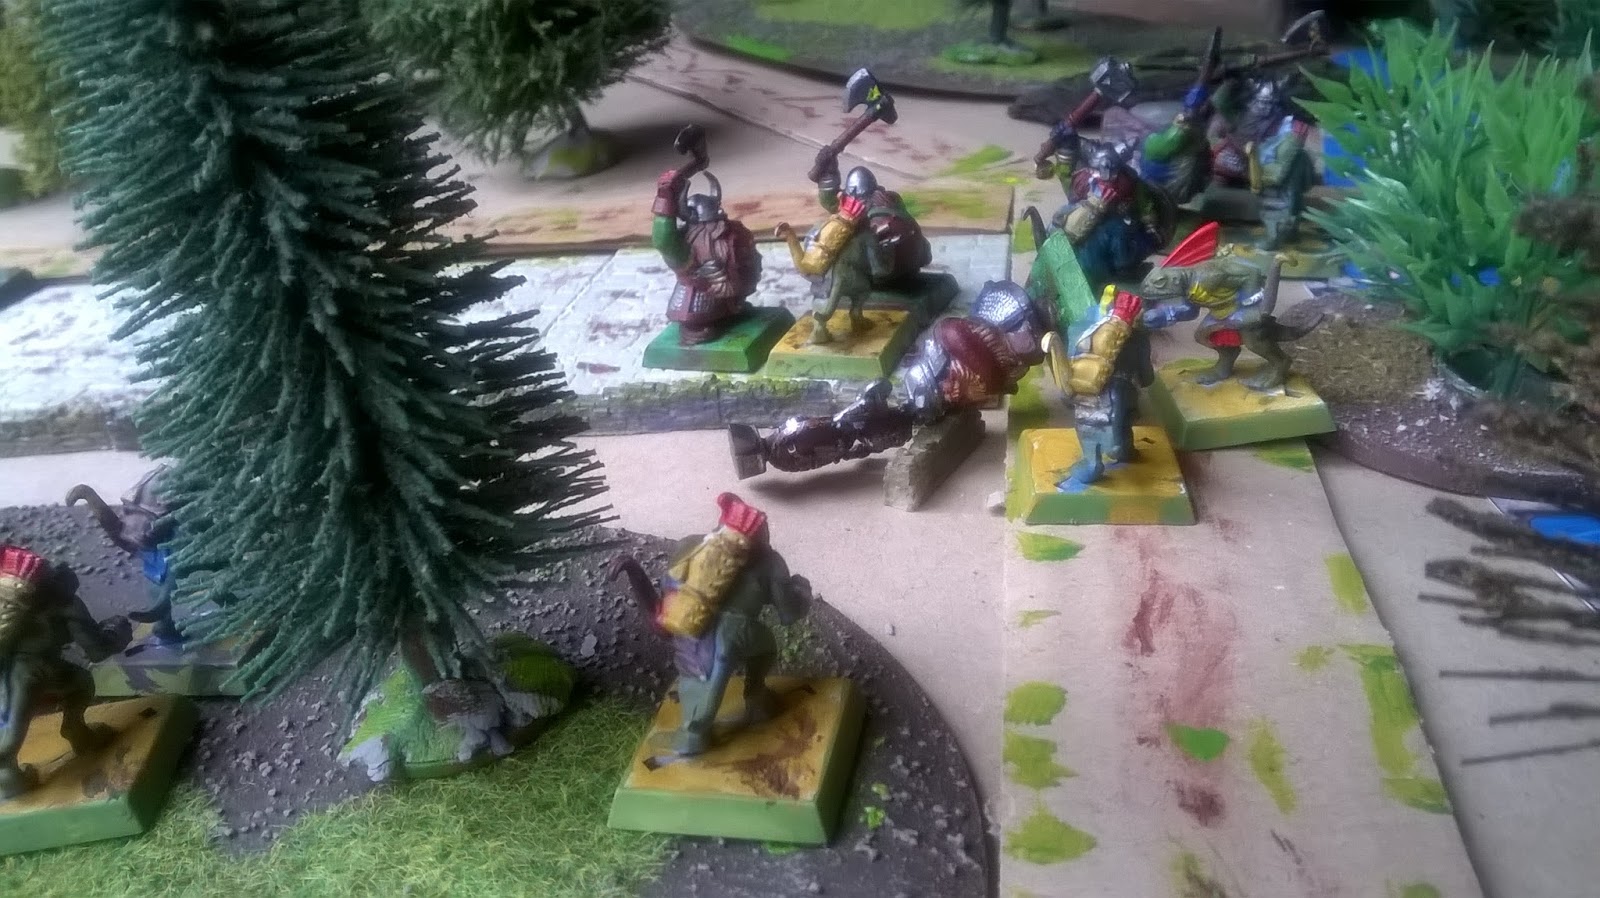
Close Combat

Eldrand swipes Yellow Top with the banner again (3), but it bounces off its stout head ridge (1).
Yellow Top slices Eldrand's arm once with a claw (4,1) while Eldrand was distracted by Red top 2 attacking him too, this causes a critical wound (6), and puts him out of action (6). (YT Gains 1 xp.)
Eldrand falls victim to an attack.

Bromm strikes Juvenile 3 with his Hammer of Justice (4) but it bounces off its arm (2) as he is dismayed to see Eldrand fall in battle. He tries to recover, hitting with his dagger, (6), just causing a long graze (1) along its arm.
Juvenile 3 misses with its first claw, due to the sharp pain caused by the shallow wound (3,5) but hits with its second, but fails to penetrate his armour (3) since he was off balance.

Klacker, infuriated by seeing his hero fall, attacks Redtop 1 furiously (6), Red had been distracted too by the first intruders fall, he Wounds on a (6) and puts him Out of Action.

Grinder attacks Juvenile 3 (1) and misses with his axe, his dagger hits (3) the creature, wounding it slightly (2) as its bracelet took most of the force of the blow. It oozed with pale green blood.

Strom attacks Juvenile 3 while it staggered under the previous blow and hits (3), causing a deep wound to his right arm (6) Critical (4) Stunned, then Gormish puts him Out of Action as he collapses on the floor with a kick to the head.

Turn 3

(No recoveries needed).
Juvenile 2 finally frees itself from the swamp and charges Strom. Red two charged Grinder, Yellow Top charged Strom, seeking to turn the tide of battle. Red one charged Klacker. Warriors 1 and 2 both attack Yolm.

Bronn aims at Juvenile 1, but misses wildly with his axe (1), then misses with his dagger too (2).
Juvenile 1 hits with both claws, (5,4), (4,2) but fails to capitalise on his enemies errors. No damage was done.

Juvenile 2 looses his fight.
Strom defends against Juvenile 2, (4) hits it, wounds (4) it with a blow to the head, (4) It is stunned (in water). Failed Initiative – Drowned / Out of action.(Strom gains 1 xp.)

Grinder defends himself against Red Top 2, misses with his axe (1), but weakly hits with his dagger (4) on its leg, no deep wounds were caused (1). Red 2 gives a roar and hits him twice, (6,5), Grinder failed to parry the blows, (4), no wounds were caused (2,3) as he was moving backwards at the time.

Gornish defends against the snarling Yellow Top, he misses with his axe (3) and his dagger (2). Yellow Top presses home his attack, hitting the youngblood twice (5,5), (4,4) Gornish blocks one blow with his shield (6) parry ,(2) no wounds caused.


Klacker joins in with Grinder against Red Top 2, hits it with his axe(6), no wounds caused (1), but it exposes his chest to attack, hits with his dagger (4), wounds (4), Red Top 2 falls to the floor and is now Out of Action. They look round for another target.

Yolm defends himself against attacking Warriors 1 and 2. He firstly goes for Warrior 1, hittting it (3), tries to wound with his axe (2), but just takes off a few scales. He attacks Warrior 2 with his dagger, who avoids his blow (2).
Warrior 1 aims a blow to his arm, (1,1) but misses. Warrior 2 tries to attack the same arm, but Warrior 1 got in the way, so they both miss (3,3).

Turn 4

The Lizardmen failed their rout test roll (11), Yellow Top realizes they are outclassed against this enemy at this time, shouts “Flee! Flee!”

The Skinks dart in all directions, seeking safety.

They rush over to Eldrand and bandage his arm and put it into a sling. They set up watch and make camp here for the night.

The End
Aftermath

(I have just checked the rules and spotted an error in my earlier skill advances and my Xp (only heroes and not henchmen gained xp for putting enemies out of action, so these have now been amended).

Dwarf Team 1

Everybody gets 1 xp.
Eldrand gets an injured arm, but survives. (But he is out of action for the next scrap.)
Bronn gets 2 xp in total.
Strom gets 2 xp in total. He Levels up and gains Strength 4.
The party locate three Wyrdstone Shards (worth 75GC) hidden under the river bridge, a Master Map at the camp site and 18 GC on necklaces on the fallen Skinks, plus a winners award of 10 GC.

Pack 2 Lizardmen

Everybody gets 1 xp, except Red Top 2 and Juvenile 2, who die of their wounds.
Red Top 1 survives against the odds, -1 Strength in Combat, gets 2 xp in total.
Juvenile 3 makes a full recovery.
Yellow Top gains 3 xp in total.
The party find 3 Wyrdstone Shards (worth 70 GC - a lower value than above due to having more warriors in his war party) hidden in the stream bed.

(No trading as still in a wilderness area.)

There we go, I think I have everything sorted now, if I have made any errors, please pop them in the comments box.

Please like if you enjoyed it. Part three is coming soon.

Ivor

Saturday, 5 August 2017

Pause 9


Hi there,
                 Just a quick post to let you know that I have finally completed describing the first skirmish of  "The Journey To Mordheim part 2", my 28 mm Warhammer Fantasy battle report. Its not quite as good as the Journey to the Misty Mountain, but I had fun doing it.
                It will be turn-based, as usual, not a video production, as some clever folks can put out, but I hope you like my narrative style, as I go through the moves and reactions of the minis. I'm not sure how many chunks it will end up in, so please bear with me as we go along in what may be a haphazard fashion.
              Now that I have just finished the first battle, I wonder who will be next on the stage to face our heroes? (It is randomly generated from a list of naughty critters I have on standby.)

On the wider picture, a kind little birdie dropped me a note in my email regarding those chaps at Two Hour Wargames are releasing their earlier works, "Larger than Life Directors Cut" and "Adventures in the Lost Lands" for $9.95 each. Both of these titles should be capable of giving you a good yarn, everything else I have tried of theirs has been top notch and the rules usually cater for solo play (Just check on their website or forum to confirm it).

For more info, check out "A little treat".

Ivor

Tuesday, 11 July 2017

WHF-The Journey Part One.

Hey folks.
                I'm just setting up my battleground that my merry band of Dwarfs will have to pass through on the way to the mysterious and fabulously wealthy place that is Mordheim. The streets are paved with gold and jewels, with magical artifacts ripe for the picking, so 'tis said, although the people that are saying it are not exactly fabulously wealthy themselves, another mystery to be solved. My landscape is not totally complete yet, bits need painting and gluing. I'm pondering on the party size, I may split my group into two.

The wooded area.
The hilly area.
The Farmstead
That is just the thing to get the dice rolling.

I have added a few bits here and there, a couple of camp sites and paths need to be painted up, the ruin has been modified slightly. I have got to wait on the postie for some characters to arrive. It's a bit greener and wetter, but the tree bases need painting as well. Swings and roundabouts.

I pondered on adding some extra photos but don't want to ruin the actual conflict to come.

What's that?

OK, you talked me into it, one photo, two if you are good.

Woodland trek

The Camp Site
I hope you like the setup. As for the baddies, you will just have to wait and see, I'm thinking of at least two lots for variety.

Ivor Cogdell


Thursday, 29 June 2017

5P - Job 1 - Hologame part 6

Hi all,
This is my sixth and final installment of the first Holo-game in the lounge of the Spaceship Magic Carpet.

The remaining players.

                                   Armour                                   Snap Fire            Aimed              Combat
                 React Exposed Cover      Weapon      Range  to hit     Range to hit      Hit    Parry Speed
Lucy             8           7           10       BP + Knife         8       1D+1      16       1D+2    2D+2               3
Sgt Ted       10          8           10       BP + Chain        8       1D+1      16       1D+2    2D+3     P
Gus              8           7           10       BP + Knife         8       1D+1      16       1D+2    2D+2
(-2 to hit rolls)

Squad 2 100 PTS
Martin         8            7           10        BP + Knife        8        1D+1      16        1D+2   2D+2
Chris           8            7           10        BP + Knife        8        1D+1      16        1D+2   2D+2
Pinky           8           7            10        BP + Knife        8        1D+1      16        1D+2   2D+2
Harry           8           7            10        BP + Knife        8         1D+1      16        1D+2   2D+2              4

Baddies
Warrior     7            11          11       Deathspitter        8         1D+5      24        1D+5  2D+6               6

Extra Action Table D12 Roll              Actions
1-4 = 0                                                  Charge = Speed +2 (No shoot, can attack
5-8 = 1                                                                  (cost 1 square of move))
9-12=2                                                 Advance= Speed (Can Snap shoot, can attack
13-16=3                                                                (cost 1 square of move))
17+=4                                                  Ready Weapon = Move 1 square (Optional)
Sgt gives +2 to extra action rolls.        Take an aimed shot or throw grenade. Enter Overwatch status.
                                                             Reload= Reload weapon.
                                                                            Move 1 square (Optional).
                                                                            No attacks.

For other stats and House rules, see part one.

Turn 13

Roll for extra actions. 8 +2 =10. So 2 extra actions are available.

Squad 1


                                                                        Exposed       Hit Points
Forebrain (Right)                                                   6                  3
Aftbrain (On green nutrient slab)                           5                  3


Lucy, Sgt. Ted and Gus advance into the next chamber. It contains two sections of material and a warrior behind the second element.


(1-3=Warrior, 4-6 =Aft Brain).
Lucy fires at the (3) warrior, but (8,2). Both miss.
Gus fires at the warrior (10-2=8,8-2=6). Both miss.

Sgt. Ted fires at the Warrior (1 – Out of ammo). He uses an Extra action to throw his last Frag grenade while he reloads. The grenade lands just beyond the warrior, it goes off and the warrior is not injured, but is stunned by the blast.

Gus uses an Extra action to advance to Lucy and throws one of her frag grenades. It hits the middle of the brain, but rolls off to one side before it explodes.

(Both parts of the brain are in the blast radius, frag attack roll of 10, both parts take 1 point of damage.)


Squad 2


The outsides of the brains have been blackened by the fragmentation grenade. Pinky hears the firing and the grenades going off, so he charges into the room where the party has recently entered and the smoke is drifting out of.


 Martin, Chris and Harry charge forward along the passage, hoping they can be of help.

Meanwhile


Another violent shudder goes through the ship. The warrior slowly backs up and starts to turn around. The blip is telepathically stunned, but gradually makes its way towards the entrance.

Turn 14

Roll for extra actions. 10 +2 =12. 2 extra actions available.

Squad 1

(1-4 = Forebrain, 5-6 =Aft Brain, 7-8 = Warrior, 9-10 = Miss).

Lucy aims a quick burst at the warrior, but a shockwave passes through the room as she fires, (6) and hits the Aft brain, damaging it further, 1 hp left. The second (4) hits the forebrain, it has 1 hp left also now.

For Gus (1-3 = Forebrain, 5-7 =Aft Brain, 8=miss, 9-10= Warrior, 11-12 = Miss).

Gus aims at the warrior, but he (12) misses the warrior by a fraction, his second shot hits (7), but (2) bounces off its carapace.

Sgt.Ted advances slightly to get a better shooting angle and then lets off a volley at the warrior.

(1-9 = Warrior, 10 = Miss).(7,2,9,3,1 – 5 hits scored, 9,6,3,9,11). The last shot hit a vital spot and the warrior crumpled to the ground. 2 Victory Points.


Squad 2

Pinky lets off a volley at the two brains.
(1-3 = Forebrain, 4-5 =Aft Brain, 6 = Miss).
d6-(3,6,5,2,1,1-5 hits).
D12-(3,5,4,6,8), Both brains destroyed. 20 Victory Points.

The ship gives a judder and then stops vibrating.

(Extra Actions not used.)
Meanwhile


Another Warrior appears, staggering around the corner, armed with another Deathspitter. It squirts acid at Pinky, who it sees is the most recent threat. (9+5) This causes an extra drain on his shields, now down to 1.
Gus also gets splashed by acid, (8) he shudders with the pain. Now at -3 to hit.

Turn 15

Roll for extra actions. 2 +2 =4. No extra actions available.

Squad 1


Lucy fires first (11 +1) and hits at a vital spot, killing the final Warrior. 2 Victory points.


The End.


The Scores


Martin - 6th with 2 Points.
Dave - 5th with 3 Points.
Lucy – 4th with 4 Points.
Ted – Third with 12 Points.
Chris – Second with 14 Points.

The Winner with 24 Points – is Pinky.

There you go, all finally done. It took slightly longer than I expected, but as you can see in Pause 8, "Life" had stubbed my toe. The "Aft Brain" was hand sculpted from clay. GW models were from the "Rogue Trooper" era. The bolt blasts were cable ties. Please hit the G+1 button if you enjoyed the fun. Thanks for taking the time to follow this to the end.

Ivor


Saturday, 24 June 2017

Pause 8

Hi all,
          I have hit a real life snag, as you do from time to time. as I am having a new bathroom installed, new plumbing, fittings, a shiny new bath and shower installed, tiled floor and walls (I took ages to pick the tiles, lol).

           The electrics are half done, a wire from the bathroom runs under the floorboards downstairs to my mains area, a safety isolation switch has to be added yet, but first I need a new fuse box to be fitted by my Electric company as the installed one is out of date by 40-odd years. (Still no news after a fortnight, I will give them a prod again. Their reply - Any electrician can do it. So that's another hurdle overcome)

           (Good News) I have cold running water again, for the time being, sheer bliss. More pipework needs to be done for the washbasin. The bath is installed, but the taps are still loose (Need fixing to the bath itself.)
            (Bad news) The water board are outside doing maintenance and are prone to cut the water off at no notice, such is their hobby.

          This will make me a very happy bunny once it is all finished, but it is slowing me down, game wise. I am doing a landscape painting as well, so am torn between the two hobbies. I usually make stuff / paint minis / play until inspiration strikes, then swap over to my landscape painting
.
            I have just completed my sixth and final episode of my first 5 Parsecs Hologame and that is now online.

          I have completed painting my Dwarf warriors, I  have just done the game stats for them and their travelling companions, and have almost finished with the baddie teams (yes teams). I have got most of my nasties painted (pics coming soon). I have posted pictures of the battleground to be fought over, now much improved.

           I am doing a bit of paper terrain and adding foam board for strength. I have added extra details on it, but some bits still need painting.

That's my status at this time, whats known as snail mode, but I am progressing.

Another bit of good news is that I have an invite to go to a gaming session with a mate, but the date has yet to be confirmed. I will report on that when it happens.

Regards all,

Ivor

Tuesday, 20 June 2017

Painting Dwarf Warriors Part 4

Hi all,
         Here are the results of another painting session, the warriors are now complete, apart from the odd tweak or touch up that may be needed.


The standard Bearer.

The Chief.

The Battle Horn.

The Champion.
Now to get started on some opponents......

Ivor

Wednesday, 7 June 2017

WIP - Painting Dwarf Miniatures Part 3

Hi all,
           Here are my next bunch of snaps of my Fantasy Dwarven Skirmishers, for an upcoming scrap I am planning.

Rear View

Added more details to the banner.
 

Beards and details added.


 Massed warriors.


I have distressed the leftmost Dwarf's shield and axe to give him battle damage.

Ivor